- Angular 4 Tutorial
- Angular 4 - Home
- Angular 4 – Overview
- Angular 4 – Environment Setup
- Angular 4 – Project Setup
- Angular 4 – Components
- Angular 4 – Module
- Angular 4 – Data Binding
- Angular 4 – Event Binding
- Angular 4 – Templates
- Angular 4 – Directives
- Angular 4 – Pipes
- Angular 4 – Routing
- Angular 4 – Services
- Angular 4 – Http Service
- Angular 4 – Forms
- Angular 4 – Animations
- Angular 4 – Materials
- Angular 4 – CLI
- Angular 4 – Examples
- Angular 4 Useful Resources
- Angular 4 - Quick Guide
- Angular 4 - Useful Resources
- Angular 4 - Discussion
- Selected Reading
- UPSC IAS Exams Notes
- Developer's Best Practices
- Questions and Answers
- Effective Resume Writing
- HR Interview Questions
- Computer Glossary
- Who is Who
Angular 4 - Pipes
In this chapter, we will discuss what are Pipes in Angular 4. Pipes were earlier called filters in Angular1 and called pipes in Angular 2 and 4.
The | character is used to transform data. Following is the syntax for the same
{{ Welcome to Angular 4 | lowercase}}
It takes integers, strings, arrays, and date as input separated with | to be converted in the format as required and display the same in the browser.
Let us consider a few examples using pipes.
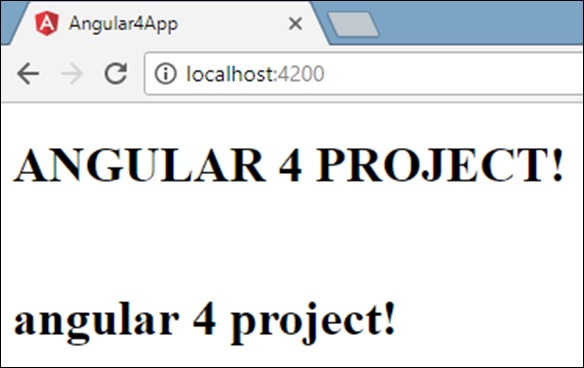
Here, we want to display the text given to uppercase. This can be done using pipes as follows −
In the app.component.ts file, we have defined the title variable −
app.component.ts
import { Component } from '@angular/core';
@Component({
   selector: 'app-root',
   templateUrl: './app.component.html',
   styleUrls: ['./app.component.css']
})

export class AppComponent {
   title = 'Angular 4 Project!';
}
The following line of code goes into the app.component.html file.
<b>{{title | uppercase}}</b><br/>
<b>{{title | lowercase}}</b>
The browser appears as shown in the following screenshot −

Angular 4 provides some built-in pipes. The pipes are listed below −
- Lowercasepipe
- Uppercasepipe
- Datepipe
- Currencypipe
- Jsonpipe
- Percentpipe
- Decimalpipe
- Slicepipe
We have already seen the lowercase and uppercase pipes. Let us now see how the other pipes work.
The following line of code will help us define the required variables in app.component.ts file −
import { Component } from '@angular/core';

@Component({
   selector: 'app-root',
   templateUrl: './app.component.html',
   styleUrls: ['./app.component.css']
})

export class AppComponent {
   title = 'Angular 4 Project!';
   todaydate = new Date();
   jsonval = {name:'Rox', age:'25', address:{a1:'Mumbai', a2:'Karnataka'}};
   months = ["Jan", "Feb", "Mar", "April", "May", "Jun",
             "July", "Aug", "Sept", "Oct", "Nov", "Dec"];
}
We will use the pipes in the app.component.html file.
<!--The content below is only a placeholder and can be replaced.-->
<div style = "width:100%;">
   <div style = "width:40%;float:left;border:solid 1px black;">
      <h1>Uppercase Pipe</h1>
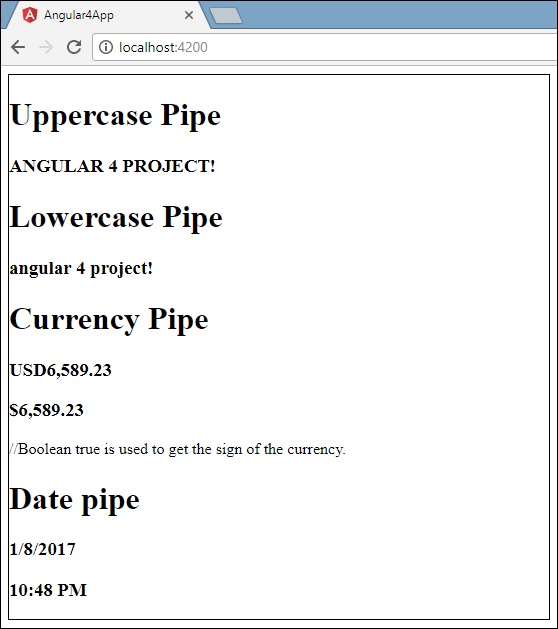
      <b>{{title | uppercase}}</b><br/>

      <h1>Lowercase Pipe</h1>
      <b>{{title | lowercase}}</b>

      <h1>Currency Pipe</h1>
      <b>{{6589.23 | currency:"USD"}}</b><br/>
      <b>{{6589.23 | currency:"USD":true}}</b> //Boolean true is used to get the sign of the currency.

      <h1>Date pipe</h1>
      <b>{{todaydate | date:'d/M/y'}}</b><br/>
      <b>{{todaydate | date:'shortTime'}}</b>

      <h1>Decimal Pipe</h1>
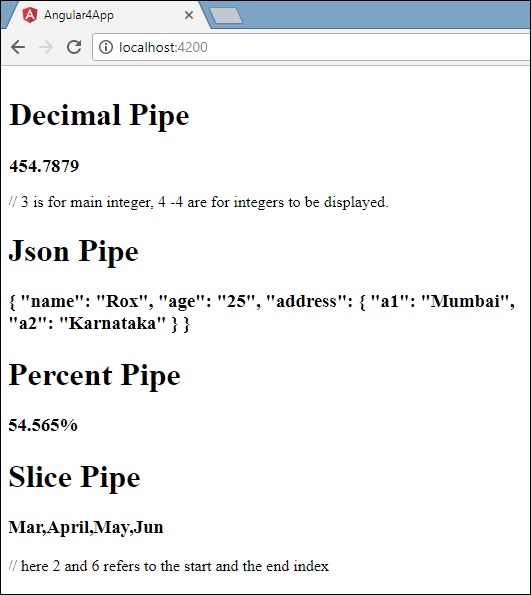
      <b>{{ 454.78787814 | number: '3.4-4' }}</b> // 3 is for main integer, 4 -4 are for integers to be displayed.
   </div>

   <div style = "width:40%;float:left;border:solid 1px black;">
      <h1>Json Pipe</h1>
      <b>{{ jsonval | json }}</b>
      <h1>Percent Pipe</h1>
      <b>{{00.54565 | percent}}</b>
      <h1>Slice Pipe</h1>
      <b>{{months | slice:2:6}}</b>
      // here 2 and 6 refers to the start and the end index
   </div>
</div>
The following screenshots show the output for each pipe −


How to Create a Custom Pipe?
To create a custom pipe, we have created a new ts file. Here, we want to create the sqrt custom pipe. We have given the same name to the file and it looks as follows −
app.sqrt.ts
import {Pipe, PipeTransform} from '@angular/core';
@Pipe ({
   name : 'sqrt'
})
export class SqrtPipe implements PipeTransform {
   transform(val : number) : number {
      return Math.sqrt(val);
   }
}
To create a custom pipe, we have to import Pipe and Pipe Transform from Angular/core. In the @Pipe directive, we have to give the name to our pipe, which will be used in our .html file. Since, we are creating the sqrt pipe, we will name it sqrt.
As we proceed further, we have to create the class and the class name is SqrtPipe. This class will implement the PipeTransform.
The transform method defined in the class will take argument as the number and will return the number after taking the square root.
Since we have created a new file, we need to add the same in app.module.ts. This is done as follows −
import { BrowserModule } from '@angular/platform-browser';
import { NgModule } from '@angular/core';
import { AppComponent } from './app.component';

import { NewCmpComponent } from './new-cmp/new-cmp.component';
import { ChangeTextDirective } from './change-text.directive';
import { SqrtPipe } from './app.sqrt';

@NgModule({
   declarations: [
      SqrtPipe,
      AppComponent,
      NewCmpComponent,
      ChangeTextDirective
   ],

   imports: [
      BrowserModule
   ],
   providers: [],
   bootstrap: [AppComponent]
})
export class AppModule { }
We have created the app.sqrt.ts class. We have to import the same in app.module.ts and specify the path of the file. It also has to be included in the declarations as shown above.
Let us now see the call made to the sqrt pipe in the app.component.html file.
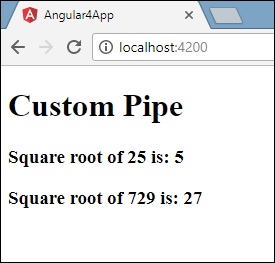
<h1>Custom Pipe</h1>
<b>Square root of 25 is: {{25 | sqrt}}</b>
<br/>
<b>Square root of 729 is: {{729 | sqrt}}</b>
The output looks as follows −
