- iOS Tutorial
- iOS - Home
- iOS - Getting Started
- iOS - Environment Setup
- iOS - Objective-C Basics
- iOS - First iPhone Application
- iOS - Actions and Outlets
- iOS - Delegates
- iOS - UI Elements
- iOS - Accelerometer
- iOS - Universal Applications
- iOS - Camera Management
- iOS - Location Handling
- iOS - SQLite Database
- iOS - Sending Email
- iOS - Audio & Video
- iOS - File Handling
- iOS - Accessing Maps
- iOS - In-App Purchase
- iOS - iAd Integration
- iOS - GameKit
- iOS - Storyboards
- iOS - Auto Layouts
- iOS - Twitter & Facebook
- iOS - Memory Management
- iOS - Application Debugging
- iOS Useful Resources
- iOS - Quick Guide
- iOS - Useful Resources
- iOS - Discussion
- Selected Reading
- UPSC IAS Exams Notes
- Developer's Best Practices
- Questions and Answers
- Effective Resume Writing
- HR Interview Questions
- Computer Glossary
- Who is Who
iOS - Delegates
Example for Delegate
Let's assume an object A calls an object B to perform an action. Once the action is complete, object A should know that B has completed the task and take necessary action. This is achieved with the help of delegates.
The key concepts in the above example are −
A is a delegate object of B.
B will have a reference of A.
A will implement the delegate methods of B.
B will notify A through the delegate methods.
Steps in Creating a Delegate
Step 1 − First, create a single view application.
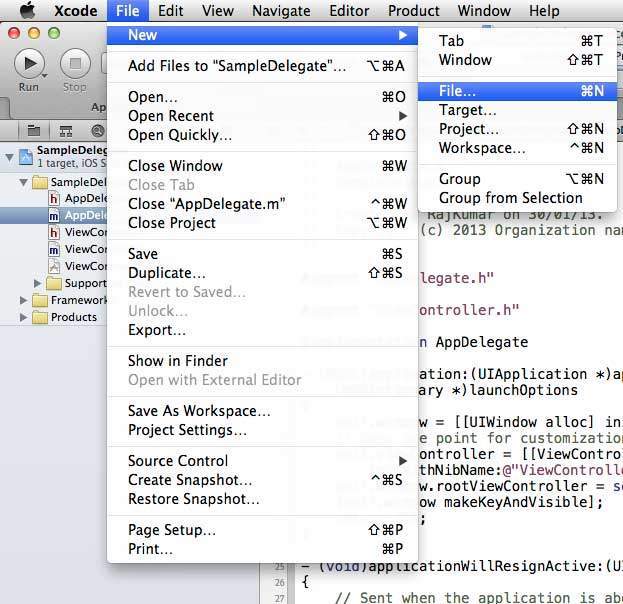
Step 2 − Then select File → New → File...

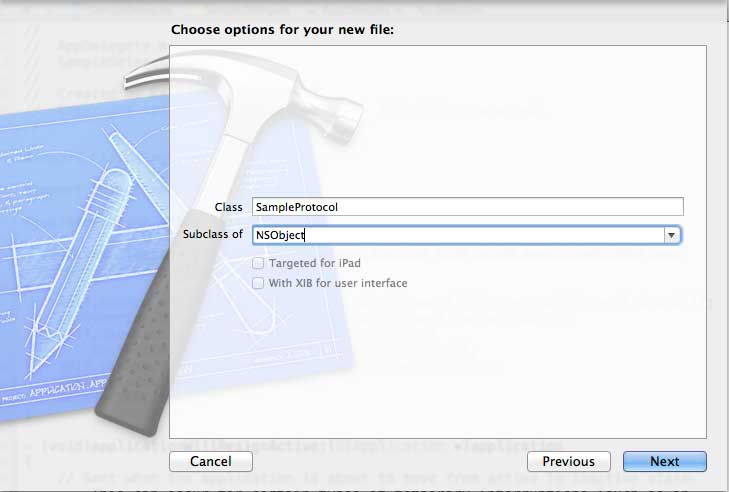
Step 3 − Then select Objective C Class and click Next.
Step 4 − Give a name to the class, say, SampleProtocol with subclass as NSObject as shown below.

Step 5 − Then select create.
Step 6 − Add a protocol to the SampleProtocol.h file and the updated code is as follows −
#import <Foundation/Foundation.h>

// Protocol definition starts here
@protocol SampleProtocolDelegate <NSObject>
@required
- (void) processCompleted;
@end

// Protocol Definition ends here
@interface SampleProtocol : NSObject {
   // Delegate to respond back
   id <SampleProtocolDelegate> _delegate;
}
@property (nonatomic,strong) id delegate;

-(void)startSampleProcess; // Instance method
@end
Step 7 − Implement the instance method by updating the SampleProtocol.m file as shown below.
#import "SampleProtocol.h"

@implementation SampleProtocol

-(void)startSampleProcess {
   [NSTimer scheduledTimerWithTimeInterval:3.0 target:self.delegate
	selector:@selector(processCompleted) userInfo:nil repeats:NO];
}
@end
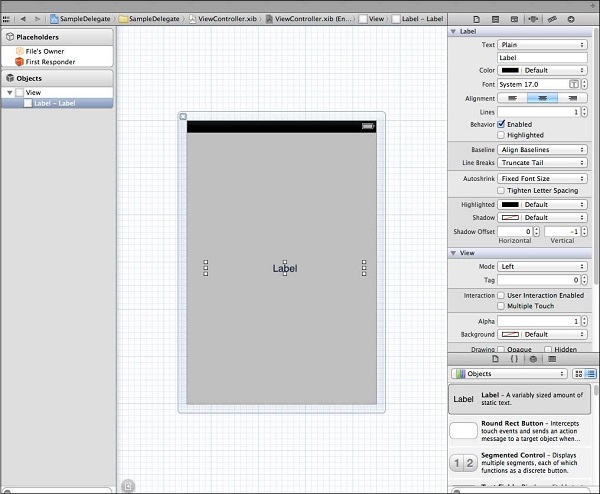
Step 8 − Add a UILabel in the ViewController.xib by dragging the label from the object library to UIView as shown below.

Step 9 − Create an IBOutlet for the label and name it as myLabel and update the code as follows to adopt SampleProtocolDelegate in ViewController.h.
#import <UIKit/UIKit.h>
#import "SampleProtocol.h"

@interface ViewController : UIViewController<SampleProtocolDelegate> {
   IBOutlet UILabel *myLabel;
}
@end
Step 10 Implement the delegate method, create object for SampleProtocol and call the startSampleProcess method. The Updated ViewController.m file is as follows −
#import "ViewController.h"

@interface ViewController ()

@end

@implementation ViewController

- (void)viewDidLoad {
   [super viewDidLoad];
   SampleProtocol *sampleProtocol = [[SampleProtocol alloc]init];
   sampleProtocol.delegate = self;
   [myLabel setText:@"Processing..."];
   [sampleProtocol startSampleProcess];
   // Do any additional setup after loading the view, typically from a nib.
}

- (void)didReceiveMemoryWarning {
   [super didReceiveMemoryWarning];
   // Dispose of any resources that can be recreated.
}

#pragma mark - Sample protocol delegate
-(void)processCompleted {
   [myLabel setText:@"Process Completed"];
}
@end
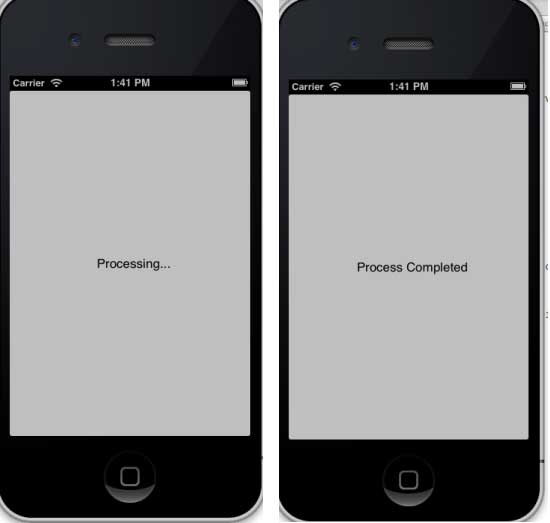
Step 11 We will see an output as follows. Initially the label displays "processing...", which gets updated once the delegate method is called by the SampleProtocol object.
