- iOS Tutorial
- iOS - Home
- iOS - Getting Started
- iOS - Environment Setup
- iOS - Objective-C Basics
- iOS - First iPhone Application
- iOS - Actions and Outlets
- iOS - Delegates
- iOS - UI Elements
- iOS - Accelerometer
- iOS - Universal Applications
- iOS - Camera Management
- iOS - Location Handling
- iOS - SQLite Database
- iOS - Sending Email
- iOS - Audio & Video
- iOS - File Handling
- iOS - Accessing Maps
- iOS - In-App Purchase
- iOS - iAd Integration
- iOS - GameKit
- iOS - Storyboards
- iOS - Auto Layouts
- iOS - Twitter & Facebook
- iOS - Memory Management
- iOS - Application Debugging
- iOS Useful Resources
- iOS - Quick Guide
- iOS - Useful Resources
- iOS - Discussion
- Selected Reading
- UPSC IAS Exams Notes
- Developer's Best Practices
- Questions and Answers
- Effective Resume Writing
- HR Interview Questions
- Computer Glossary
- Who is Who
iOS - Universal Applications
A universal application is an application that is designed for both iPhone and iPad in a single binary. A universal application allows code reuse and fast updates.
Universal Application – Steps Involved
Step 1 − Create a simple View based application.
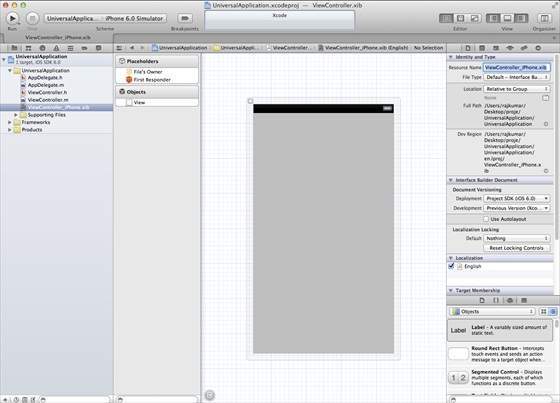
Step 2 − Change the File name ViewController.xib file to ViewController_iPhone.xib as shown below in the file inspector in the right hand side.
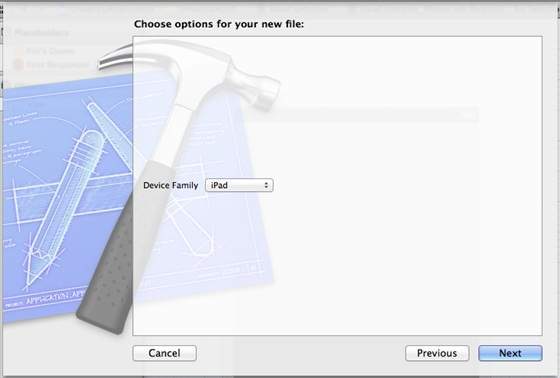
Step 3 − Select File → New → File... then select the subsection "User Interface" and select View. Click Next.

Step 4 − Select the device family as iPad and click next.
Step 5 − Save the file as ViewController_iPad.xib and select Create.
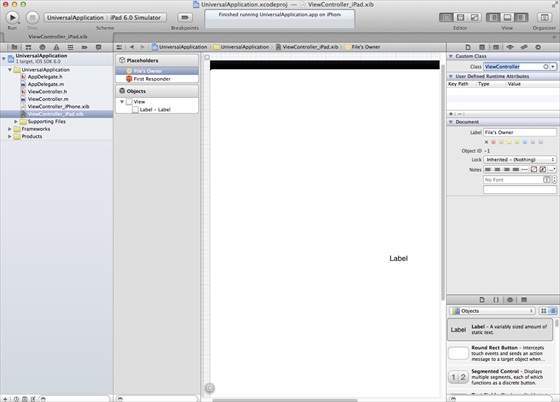
Step 6 − Add a label in the center of the screen in both ViewController_iPhone.xib and ViewController_iPad.xib.
Step 7 − In ViewController_iPad.xib, select the identity inspector and set the custom class as ViewController.
Step 8 − Update the application:DidFinishLaunching:withOptions method in AppDelegate.m as follows −
- (BOOL)application:(UIApplication *)application
   didFinishLaunchingWithOptions:(NSDictionary *)launchOptions {
   self.window = [[UIWindow alloc] initWithFrame:[[UIScreen
   mainScreen] bounds]];

   // Override point for customization after application launch.
   if (UI_USER_INTERFACE_IDIOM() == UIUserInterfaceIdiomPhone) {
      self.viewController = [[ViewController alloc]
      initWithNibName:@"ViewController_iPhone" bundle:nil];
   } else {
      self.viewController = [[ViewController alloc] initWithNibName:
      @"ViewController_iPad" bundle:nil];
   }
   self.window.rootViewController = self.viewController;
   [self.window makeKeyAndVisible];
   return YES;
}
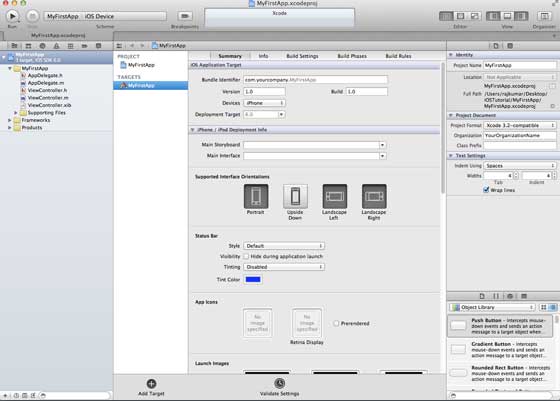
Step 9 − Update the devices in project summary to Universal as shown below −
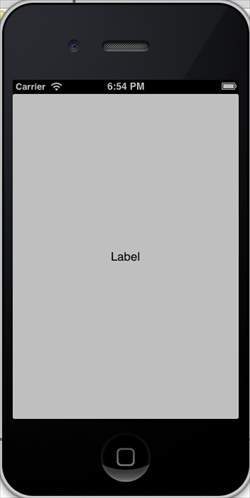
Output
When we run the application, we'll get the following output −
When we run the application in iPad simulator, we'll get the following output −