- Machine Learning With Python
- Home
- Basics
- Python Ecosystem
- Methods for Machine Learning
- Data Loading for ML Projects
- Understanding Data with Statistics
- Understanding Data with Visualization
- Preparing Data
- Data Feature Selection
- ML Algorithms - Classification
- Introduction
- Logistic Regression
- Support Vector Machine (SVM)
- Decision Tree
- Naïve Bayes
- Random Forest
- ML Algorithms - Regression
- Random Forest
- Linear Regression
- ML Algorithms - Clustering
- Overview
- K-means Algorithm
- Mean Shift Algorithm
- Hierarchical Clustering
- ML Algorithms - KNN Algorithm
- Finding Nearest Neighbors
- Performance Metrics
- Automatic Workflows
- Improving Performance of ML Models
- Improving Performance of ML Model (Contd…)
- ML With Python - Resources
- Machine Learning With Python - Quick Guide
- Machine Learning with Python - Resources
- Machine Learning With Python - Discussion
- Selected Reading
- UPSC IAS Exams Notes
- Developer's Best Practices
- Questions and Answers
- Effective Resume Writing
- HR Interview Questions
- Computer Glossary
- Who is Who
Machine Learning with Python - Ecosystem
An Introduction to Python
Python is a popular object-oriented programing language having the capabilities of high-level programming language. Its easy to learn syntax and portability capability makes it popular these days. The followings facts gives us the introduction to Python −
Python was developed by Guido van Rossum at Stichting Mathematisch Centrum in the Netherlands.
It was written as the successor of programming language named ‘ABC’.
It’s first version was released in 1991.
The name Python was picked by Guido van Rossum from a TV show named Monty Python’s Flying Circus.
It is an open source programming language which means that we can freely download it and use it to develop programs. It can be downloaded from www.python.org.
Python programming language is having the features of Java and C both. It is having the elegant ‘C’ code and on the other hand, it is having classes and objects like Java for object-oriented programming.
It is an interpreted language, which means the source code of Python program would be first converted into bytecode and then executed by Python virtual machine.
Strengths and Weaknesses of Python
Every programming language has some strengths as well as weaknesses, so does Python too.
Strengths
According to studies and surveys, Python is the fifth most important language as well as the most popular language for machine learning and data science. It is because of the following strengths that Python has −
Easy to learn and understand − The syntax of Python is simpler; hence it is relatively easy, even for beginners also, to learn and understand the language.
Multi-purpose language − Python is a multi-purpose programming language because it supports structured programming, object-oriented programming as well as functional programming.
Huge number of modules − Python has huge number of modules for covering every aspect of programming. These modules are easily available for use hence making Python an extensible language.
Support of open source community − As being open source programming language, Python is supported by a very large developer community. Due to this, the bugs are easily fixed by the Python community. This characteristic makes Python very robust and adaptive.
Scalability − Python is a scalable programming language because it provides an improved structure for supporting large programs than shell-scripts.
Weakness
Although Python is a popular and powerful programming language, it has its own weakness of slow execution speed.
The execution speed of Python is slow as compared to compiled languages because Python is an interpreted language. This can be the major area of improvement for Python community.
Installing Python
For working in Python, we must first have to install it. You can perform the installation of Python in any of the following two ways −
Installing Python individually
Using Pre-packaged Python distribution − Anaconda
Let us discuss these each in detail.
Installing Python Individually
If you want to install Python on your computer, then then you need to download only the binary code applicable for your platform. Python distribution is available for Windows, Linux and Mac platforms.
The following is a quick overview of installing Python on the above-mentioned platforms −
On Unix and Linux platform
With the help of following steps, we can install Python on Unix and Linux platform −
First, go to www.python.org/downloads/.
Next, click on the link to download zipped source code available for Unix/Linux.
Now, Download and extract files.
Next, we can edit the Modules/Setup file if we want to customize some options.
Next, write the command run ./configure script
make
make install
On Windows platform
With the help of following steps, we can install Python on Windows platform −
First, go to www.python.org/downloads/.
Next, click on the link for Windows installer python-XYZ.msi file. Here XYZ is the version we wish to install.
Now, we must run the file that is downloaded. It will take us to the Python install wizard, which is easy to use. Now, accept the default settings and wait until the install is finished.
On Macintosh platform
For Mac OS X, Homebrew, a great and easy to use package installer is recommended to install Python 3. In case if you don't have Homebrew, you can install it with the help of following command −
$ ruby -e "$(curl -fsSL
https://raw.githubusercontent.com/Homebrew/install/master/install)"
It can be updated with the command below −
$ brew update
Now, to install Python3 on your system, we need to run the following command −
$ brew install python3
Using Pre-packaged Python Distribution: Anaconda
Anaconda is a packaged compilation of Python which have all the libraries widely used in Data science. We can follow the following steps to setup Python environment using Anaconda −
Step 1 − First, we need to download the required installation package from Anaconda distribution. The link for the same is www.anaconda.com/distribution/. You can choose from Windows, Mac and Linux OS as per your requirement.
Step 2 − Next, select the Python version you want to install on your machine. The latest Python version is 3.7. There you will get the options for 64-bit and 32-bit Graphical installer both.
Step 3 − After selecting the OS and Python version, it will download the Anaconda installer on your computer. Now, double click the file and the installer will install Anaconda package.
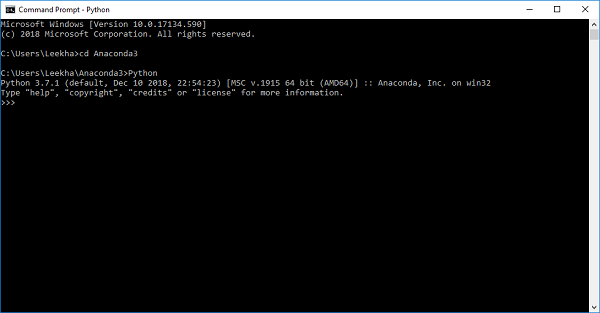
Step 4 − For checking whether it is installed or not, open a command prompt and type Python as follows −

You can also check this in detailed video lecture at www.tutorialspoint.com/python_essentials_online_training/getting_started_with_anaconda.asp.
Why Python for Data Science?
Python is the fifth most important language as well as most popular language for Machine learning and data science. The following are the features of Python that makes it the preferred choice of language for data science −
Extensive set of packages
Python has an extensive and powerful set of packages which are ready to be used in various domains. It also has packages like numpy, scipy, pandas, scikit-learn etc. which are required for machine learning and data science.
Easy prototyping
Another important feature of Python that makes it the choice of language for data science is the easy and fast prototyping. This feature is useful for developing new algorithm.
Collaboration feature
The field of data science basically needs good collaboration and Python provides many useful tools that make this extremely.
One language for many domains
A typical data science project includes various domains like data extraction, data manipulation, data analysis, feature extraction, modelling, evaluation, deployment and updating the solution. As Python is a multi-purpose language, it allows the data scientist to address all these domains from a common platform.
Components of Python ML Ecosystem
In this section, let us discuss some core Data Science libraries that form the components of Python Machine learning ecosystem. These useful components make Python an important language for Data Science. Though there are many such components, let us discuss some of the importance components of Python ecosystem here −
Jupyter Notebook
Jupyter notebooks basically provides an interactive computational environment for developing Python based Data Science applications. They are formerly known as ipython notebooks. The following are some of the features of Jupyter notebooks that makes it one of the best components of Python ML ecosystem −
Jupyter notebooks can illustrate the analysis process step by step by arranging the stuff like code, images, text, output etc. in a step by step manner.
It helps a data scientist to document the thought process while developing the analysis process.
One can also capture the result as the part of the notebook.
With the help of jupyter notebooks, we can share our work with a peer also.
Installation and Execution
If you are using Anaconda distribution, then you need not install jupyter notebook separately as it is already installed with it. You just need to go to Anaconda Prompt and type the following command −
C:\>jupyter notebook
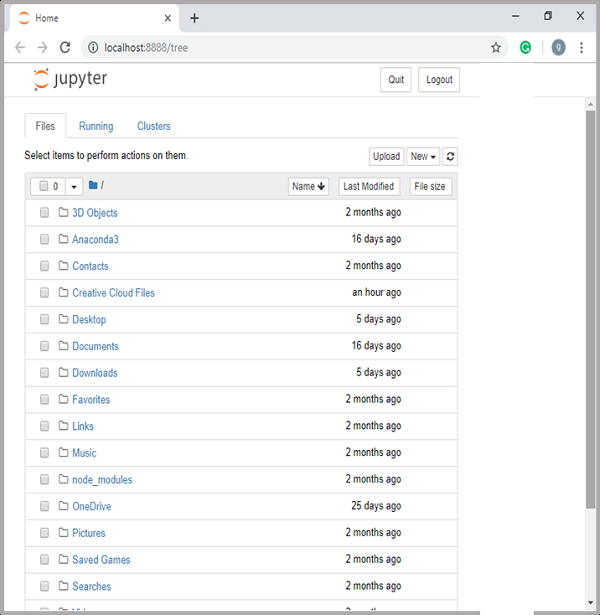
After pressing enter, it will start a notebook server at localhost:8888 of your computer. It is shown in the following screen shot −

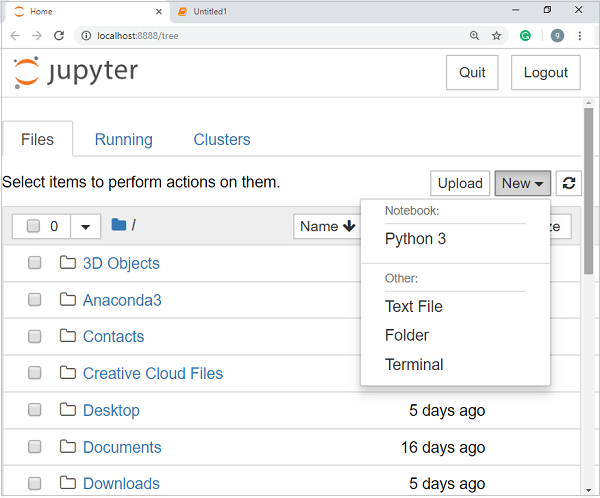
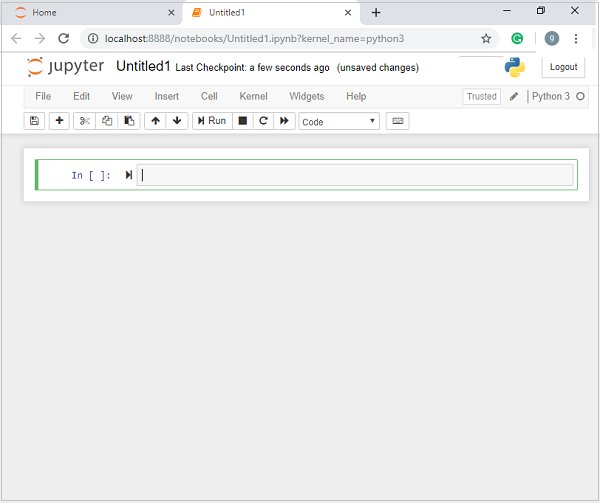
Now, after clicking the New tab, you will get a list of options. Select Python 3 and it will take you to the new notebook for start working in it. You will get a glimpse of it in the following screenshots −


On the other hand, if you are using standard Python distribution then jupyter notebook can be installed using popular python package installer, pip.
pip install jupyter
Types of Cells in Jupyter Notebook
The following are the three types of cells in a jupyter notebook −
Code cells − As the name suggests, we can use these cells to write code. After writing the code/content, it will send it to the kernel that is associated with the notebook.
Markdown cells − We can use these cells for notating the computation process. They can contain the stuff like text, images, Latex equations, HTML tags etc.
Raw cells − The text written in them is displayed as it is. These cells are basically used to add the text that we do not wish to be converted by the automatic conversion mechanism of jupyter notebook.
For more detailed study of jupyter notebook, you can go to the link www.tutorialspoint.com/jupyter/index.htm.
NumPy
It is another useful component that makes Python as one of the favorite languages for Data Science. It basically stands for Numerical Python and consists of multidimensional array objects. By using NumPy, we can perform the following important operations −
Mathematical and logical operations on arrays.
Fourier transformation
Operations associated with linear algebra.
We can also see NumPy as the replacement of MatLab because NumPy is mostly used along with Scipy (Scientific Python) and Mat-plotlib (plotting library).
Installation and Execution
If you are using Anaconda distribution, then no need to install NumPy separately as it is already installed with it. You just need to import the package into your Python script with the help of following −
import numpy as np
On the other hand, if you are using standard Python distribution then NumPy can be installed using popular python package installer, pip.
pip install NumPy
For more detailed study of NumPy, you can go to the link www.tutorialspoint.com/numpy/index.htm.
Pandas
It is another useful Python library that makes Python one of the favorite languages for Data Science. Pandas is basically used for data manipulation, wrangling and analysis. It was developed by Wes McKinney in 2008. With the help of Pandas, in data processing we can accomplish the following five steps −
- Load
- Prepare
- Manipulate
- Model
- Analyze
Data representation in Pandas
The entire representation of data in Pandas is done with the help of following three data structures −
Series − It is basically a one-dimensional ndarray with an axis label which means it is like a simple array with homogeneous data. For example, the following series is a collection of integers 1,5,10,15,24,25...
| 1 | 5 | 10 | 15 | 24 | 25 | 28 | 36 | 40 | 89 |
Data frame − It is the most useful data structure and used for almost all kind of data representation and manipulation in pandas. It is basically a two-dimensional data structure which can contain heterogeneous data. Generally, tabular data is represented by using data frames. For example, the following table shows the data of students having their names and roll numbers, age and gender −
| Name | Roll number | Age | Gender |
|---|---|---|---|
| Aarav | 1 | 15 | Male |
| Harshit | 2 | 14 | Male |
| Kanika | 3 | 16 | Female |
| Mayank | 4 | 15 | Male |
Panel − It is a 3-dimensional data structure containing heterogeneous data. It is very difficult to represent the panel in graphical representation, but it can be illustrated as a container of DataFrame.
The following table gives us the dimension and description about above mentioned data structures used in Pandas −
| Data Structure | Dimension | Description |
|---|---|---|
| Series | 1-D | Size immutable, 1-D homogeneous data |
| DataFrames | 2-D | Size Mutable, Heterogeneous data in tabular form |
| Panel | 3-D | Size-mutable array, container of DataFrame. |
We can understand these data structures as the higher dimensional data structure is the container of lower dimensional data structure.
Installation and Execution
If you are using Anaconda distribution, then no need to install Pandas separately as it is already installed with it. You just need to import the package into your Python script with the help of following −
import pandas as pd
On the other hand, if you are using standard Python distribution then Pandas can be installed using popular python package installer, pip.
pip install Pandas
After installing Pandas, you can import it into your Python script as did above.
Example
The following is an example of creating a series from ndarray by using Pandas −
In [1]: import pandas as pd

In [2]: import numpy as np

In [3]: data = np.array(['g','a','u','r','a','v'])

In [4]: s = pd.Series(data)

In [5]: print (s)

0 g
1 a
2 u
3 r
4 a
5 v

dtype: object
For more detailed study of Pandas you can go to the link www.tutorialspoint.com/python_pandas/index.htm.
Scikit-learn
Another useful and most important python library for Data Science and machine learning in Python is Scikit-learn. The following are some features of Scikit-learn that makes it so useful −
It is built on NumPy, SciPy, and Matplotlib.
It is an open source and can be reused under BSD license.
It is accessible to everybody and can be reused in various contexts.
Wide range of machine learning algorithms covering major areas of ML like classification, clustering, regression, dimensionality reduction, model selection etc. can be implemented with the help of it.
Installation and Execution
If you are using Anaconda distribution, then no need to install Scikit-learn separately as it is already installed with it. You just need to use the package into your Python script. For example, with following line of script we are importing dataset of breast cancer patients from Scikit-learn −
from sklearn.datasets import load_breast_cancer
On the other hand, if you are using standard Python distribution and having NumPy and SciPy then Scikit-learn can be installed using popular python package installer, pip.
pip install -U scikit-learn
After installing Scikit-learn, you can use it into your Python script as you have done above.