- Power BI Tutorial
- Power BI - Home
- Power BI - Introduction
- Power BI - Installation Steps
- Power BI - Architecture
- Power BI - Supported Data Sources
- Comparison with Other BI Tools
- Power BI - Data Modeling
- Power BI - Dashboard Options
- Power BI - Visualization Options
- Power BI - Excel Integration
- Sharing Power BI Dashboards
- Power BI - DAX Basics in Power BI
- Power BI - Administration Role
- Power BI Useful Resources
- Power BI - Quick Guide
- Power BI - Useful Resources
- Power BI - Discussion
- Selected Reading
- UPSC IAS Exams Notes
- Developer's Best Practices
- Questions and Answers
- Effective Resume Writing
- HR Interview Questions
- Computer Glossary
- Who is Who
Power BI - Excel Integration
In this chapter, you will learn how to integrate excel with Power BI.
Using Excel Data
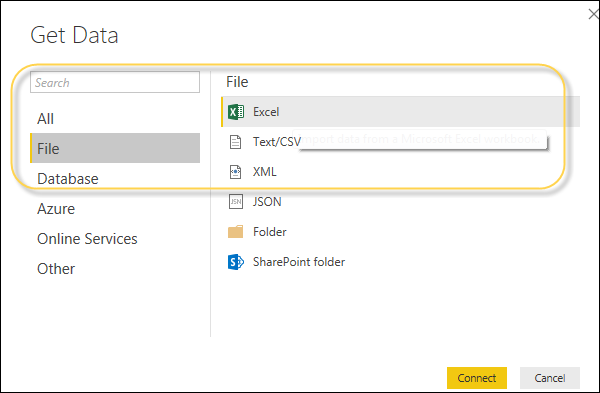
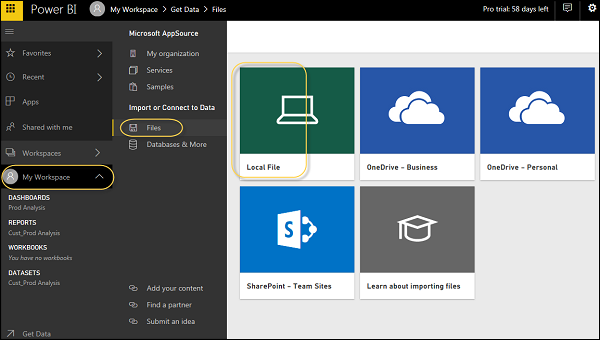
Using Power BI, you can also import Excel workbook file from the local drive into Power BI. To import data from the excel sheet, you have to ensure that each column has a proper name. To import an Excel file in Power BI, navigate to Get Data → Files → Local Files.

Importing xls Files
In Power BI Service, navigate to My Workspace → File → Local File.

Also note that it is not necessary your Excel file should only be saved on the Local Drive. You can also import an Excel workbook from OneDrive or even from SharePoint.
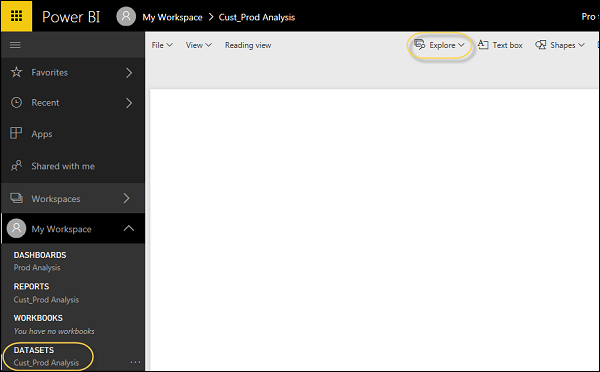
Once the dataset is imported, you are ready to create the reports in Power BI. Imported dataset is available under “DATASETS” option in Power BI menu.
Double-click Datasets. Then, navigate to the Explore tab. This will open a new Report Canvas. All the fields from your table and corresponding columns are available under the Fields option on the right side of the screen.

To create a report, select any visualization and add the fields from the table to visualization.