- SQL Tutorial
- SQL - Home
- SQL - Overview
- SQL - RDBMS Concepts
- SQL - Databases
- SQL - Syntax
- SQL - Data Types
- SQL - Operators
- SQL - Expressions
- SQL Database
- SQL - Create Database
- SQL - Drop Database
- SQL - Select Database
- SQL - Rename Database
- SQL - Show Database
- SQL - Backup Database
- SQL Table
- SQL - Create Table
- SQL - Show Tables
- SQL - Rename Table
- SQL - Truncate Table
- SQL - Clone Tables
- SQL - Temporary Tables
- SQL - Alter Tables
- SQL - Drop Table
- SQL - Delete Table
- SQL - Constraints
- SQL Queries
- SQL - Insert Query
- SQL - Select Query
- SQL - Select Into
- SQL - Insert Into Select
- SQL - Update Query
- SQL - Delete Query
- SQL - Sorting Results
- SQL Views
- SQL - Create Views
- SQL - Update Views
- SQL - Drop Views
- SQL - Rename Views
- SQL Operators and Clauses
- SQL - Where Clause
- SQL - Top Clause
- SQL - Distinct Clause
- SQL - Order By Clause
- SQL - Group By Clause
- SQL - Having Clause
- SQL - AND & OR
- SQL - BOOLEAN (BIT) Operator
- SQL - LIKE Operator
- SQL - IN Operator
- SQL - ANY, ALL Operators
- SQL - EXISTS Operator
- SQL - CASE
- SQL - NOT Operator
- SQL - NOT EQUAL
- SQL - IS NULL
- SQL - IS NOT NULL
- SQL - NOT NULL
- SQL - BETWEEN Operator
- SQL - UNION Operator
- SQL - UNION vs UNION ALL
- SQL - INTERSECT Operator
- SQL - EXCEPT Operator
- SQL - Aliases
- SQL Joins
- SQL - Using Joins
- SQL - Inner Join
- SQL - Left Join
- SQL - Right Join
- SQL - Cross Join
- SQL - Full Join
- SQL - Self Join
- SQL - Delete Join
- SQL - Update Join
- SQL - Left Join vs Right Join
- SQL - Union vs Join
- SQL Keys
- SQL - Unique Key
- SQL - Primary Key
- SQL - Foreign Key
- SQL - Composite Key
- SQL - Alternate Key
- SQL Indexes
- SQL - Indexes
- SQL - Create Index
- SQL - Drop Index
- SQL - Show Indexes
- SQL - Unique Index
- SQL - Clustered Index
- SQL - Non-Clustered Index
- Advanced SQL
- SQL - Wildcards
- SQL - Comments
- SQL - Injection
- SQL - Hosting
- SQL - Min & Max
- SQL - Null Functions
- SQL - Check Constraint
- SQL - Default Constraint
- SQL - Stored Procedures
- SQL - NULL Values
- SQL - Transactions
- SQL - Sub Queries
- SQL - Handling Duplicates
- SQL - Using Sequences
- SQL - Auto Increment
- SQL - Date & Time
- SQL - Cursors
- SQL - Common Table Expression
- SQL - Group By vs Order By
- SQL - IN vs EXISTS
- SQL - Database Tuning
- SQL Function Reference
- SQL - Date Functions
- SQL - String Functions
- SQL - Aggregate Functions
- SQL - Numeric Functions
- SQL - Text & Image Functions
- SQL - Statistical Functions
- SQL - Logical Functions
- SQL - Cursor Functions
- SQL - JSON Functions
- SQL - Conversion Functions
- SQL - Datatype Functions
- SQL Useful Resources
- SQL - Questions and Answers
- SQL - Quick Guide
- SQL - Useful Functions
- SQL - Useful Resources
- SQL - Discussion
- Selected Reading
- UPSC IAS Exams Notes
- Developer's Best Practices
- Questions and Answers
- Effective Resume Writing
- HR Interview Questions
- Computer Glossary
- Who is Who
SQL - CREATE Database
A database is a structured collection of data that is stored in a computer system. They are used to store and retrieve the data efficiently. Databases can be created using different query languages, and SQL is one such language.
The CREATE DATABASE statement is a DDL (Data Definition Language) statement used to create a new database in SQL. If you are creating your database on Linux or Unix, then database names are case-sensitive, even though SQL keywords are case-insensitive. If you are working on Windows then this restriction does not apply.
Syntax
Following is the syntax to create a database in SQL −
CREATE DATABASE DatabaseName;
Here, the “DatabaseName” is the name of the database that we want to create. The database name can be any valid identifier, such as number, letters, or underscores.
Note − The “DatabaseName” cannot be a keyword in SQL.
While creating a database, you may encounter an error such as ERROR 1044 (42000): Access denied for user 'krishna'@'localhost' to database 'DatabaseName', this means that you do not have the necessary privileges to create a database.
Example
Let us try to create a database <testDB> in SQL using the CREATE DATABASE statement −
SQL> CREATE DATABASE testDB
Note − Make sure you have the necessary privilege before creating any database.
Once the database <testDB> is created, we can check it in the list of databases as follows −
SQL> SELECT * FROM SYS.DATABASES
+--------------------+
| Database           |
+--------------------+
| master             |
| tempdb             |
| model              |
| msdb               |
| testDB             |
+--------------------+
5 rows in set (0.00 sec)
We can now set the <testDB> as the default database by using the USE statement in SQL −
SQL> USE testDB;
Database changed
That's it! we have successfully created a database in SQL. Now, we can create tables and other database objects within the new database.
Using SQL Server Management Studio
The SQL Server Management studio (SSMS) is a platform used for managing and administering SQL server instances and databases. It allows database administrators, developers, and users to connect to SQL Server instances and perform various tasks such as creating, modifying, and deleting tables, views, store procedures, and other database objects.
Following are steps to create a database using the SQL Server Management Studio −
Step 1− Open the SQL Server Management Studio in your system and connect to the SQL Server instance where you want to create the database.
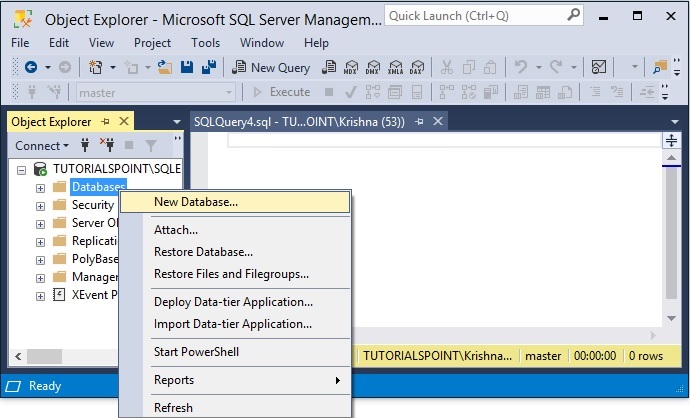
Step 2− In the Object Explorer, right click on the “Databases” option and click on the “New Database”.
Step 3− A “New Database” dialog box will be opened.
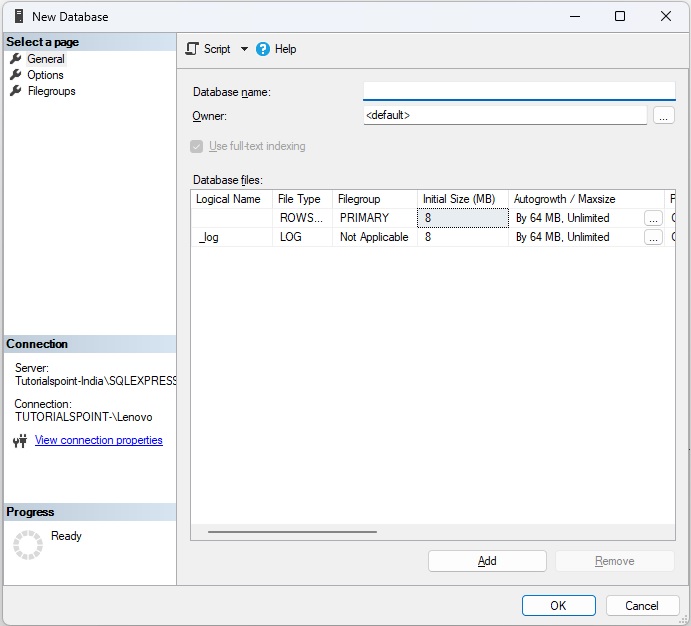
Step 4− Enter a name for the new database that you want to create in the “Database name field”.
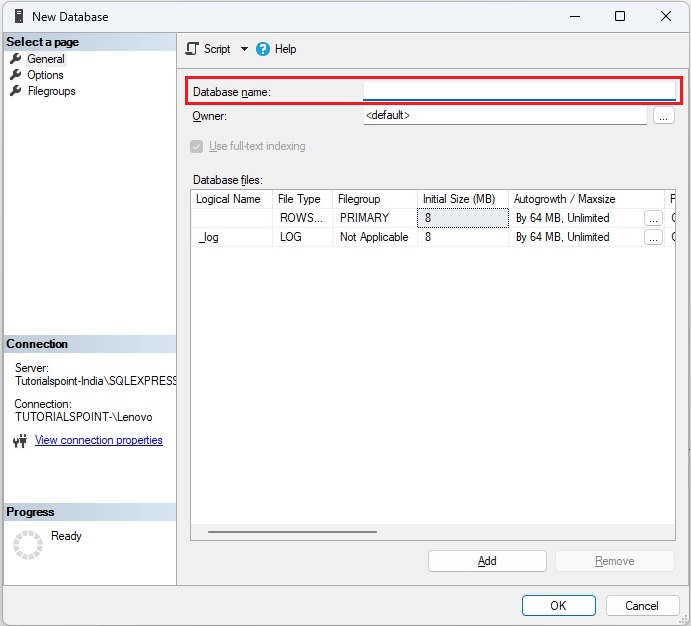
Step 5− To create the database with default values, click “OK”; otherwise, continue with the following optional steps.
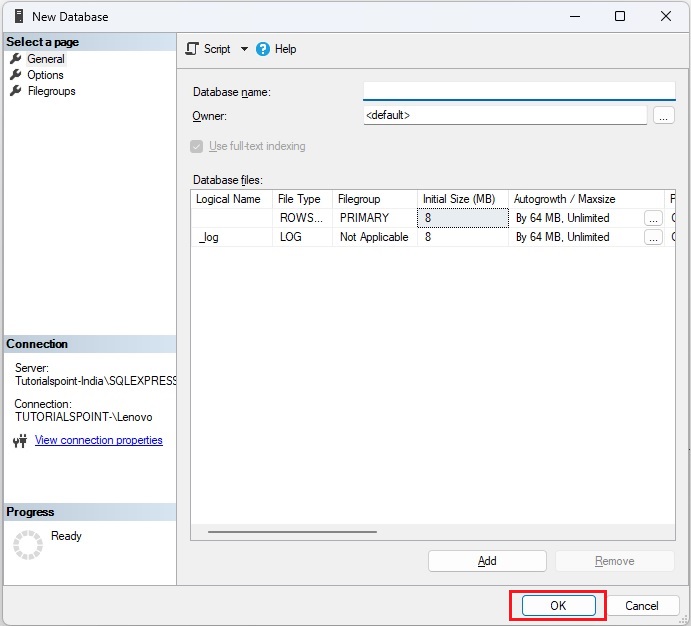
Step 6− If you want to specify a different owner for the database, click on the “…” button next to the “Owner” fiels and select a different owner.
Step 7− If you want to change the default values of the primary data and transaction log files in the “Database files” grid, select the particular cell and enter the new value.
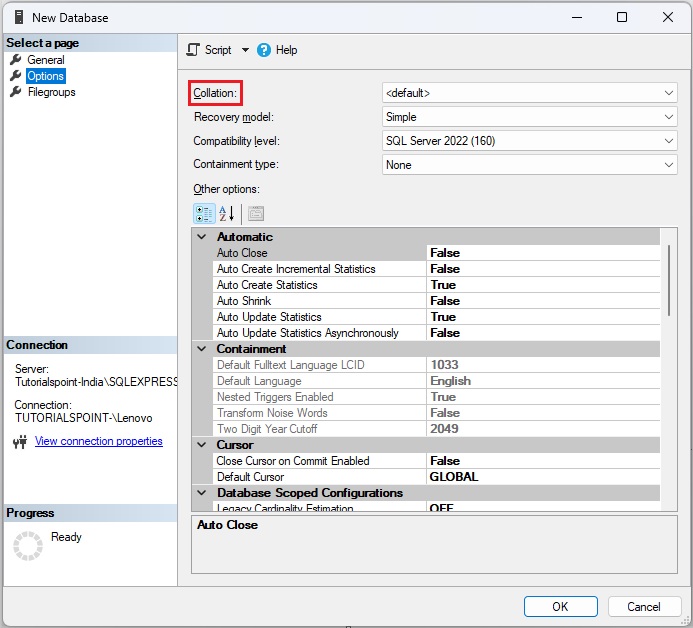
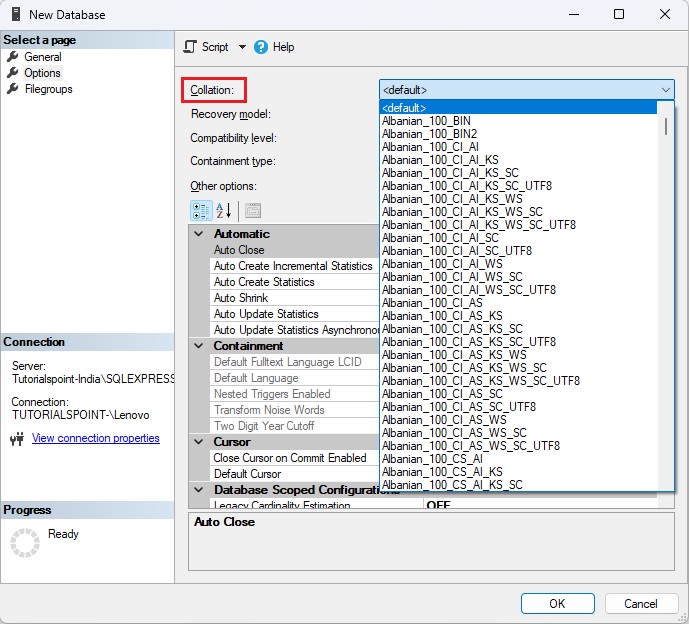
Step 8− If you want to change the collation of the database, select the options page on the top-left corner and then select a collation from the list.
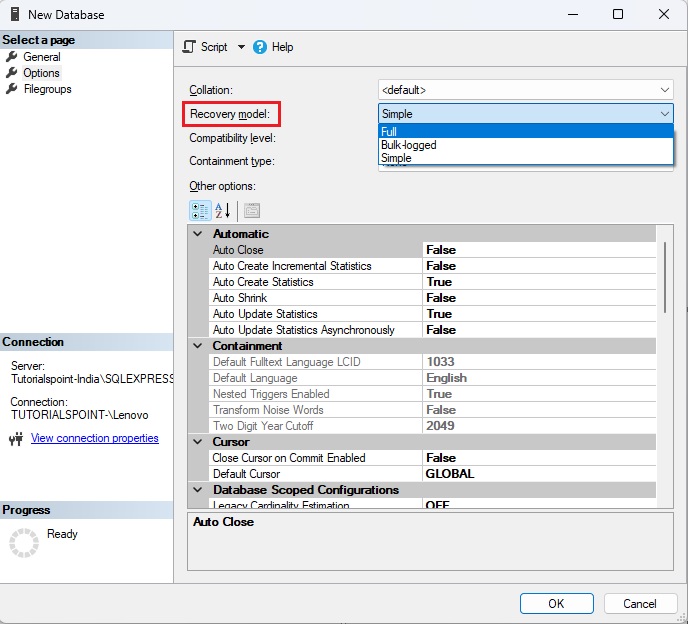
Step 9− If you want to change the recovery model of the database, select the options page and then select a recovery model from the list.
Step 10− If you want to change the database options, select the options page and then modify the database options.
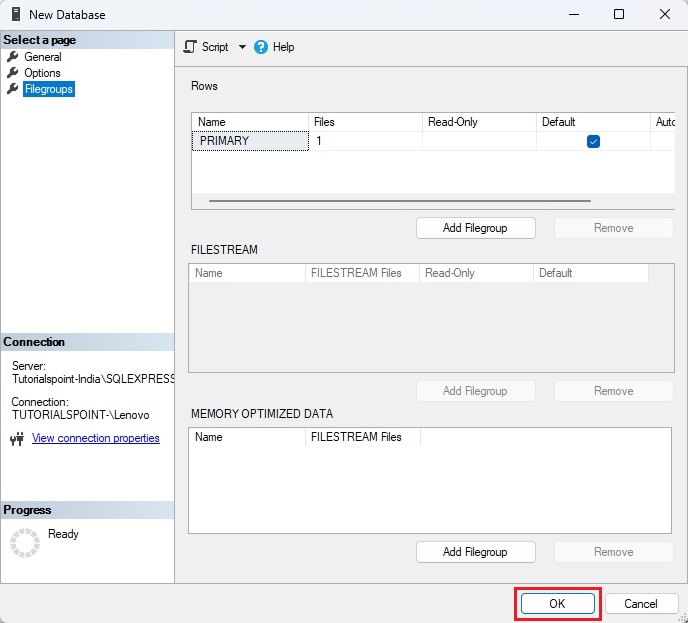
Step 11− If you want to add a filegroup, select the “Filegroups” page on the top-left corner. Then Select “Add Filegroup” and then enter the values for the file group.
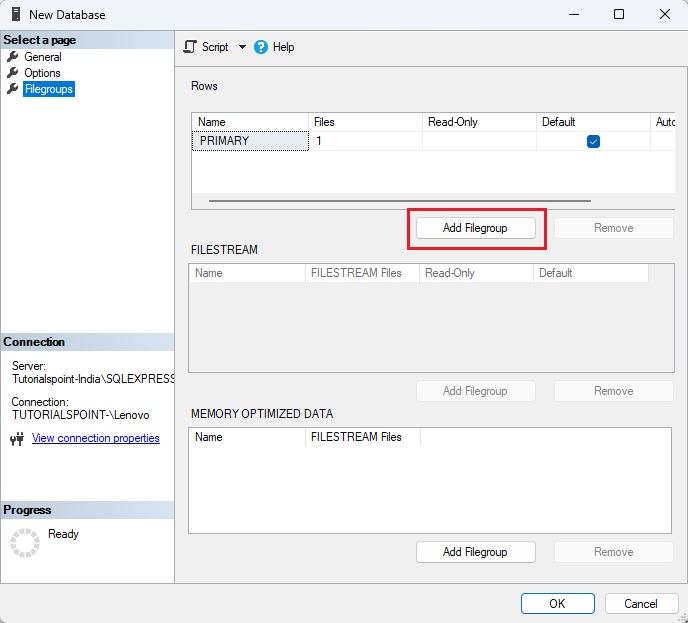
Step 12− Now, click on “OK” to create the database.
